
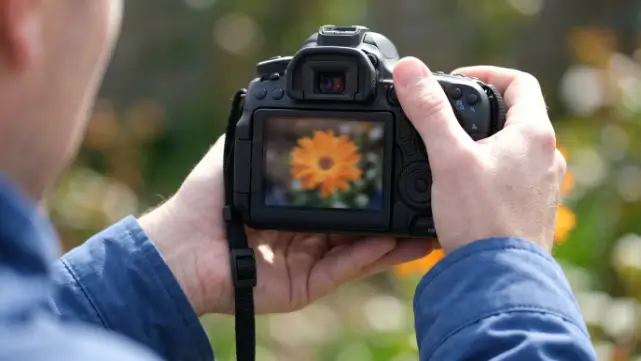
Photography is one of the most rewarding creative hobbies and professions in the world. A single photo can capture emotion, beauty, movement, and memories that last forever. But even the best cameras cannot always save a blurry image caused by shaky hands. Many photographers—both beginners and professionals—face this issue regularly.
If you’ve ever taken a photo that looked sharp on your camera screen but appeared blurry later, hand shake is often the reason. Learning how to fix shaky hands photography problems can dramatically improve your image quality and boost your confidence behind the camera.
The good news is that shaky hands photography issues are very common and completely manageable. With the right techniques, camera settings, and habits, you can take stable, sharp, and professional-looking photos even without expensive equipment.
This guide explains everything in simple language so anyone can understand and apply the techniques immediately.
Understanding Shaky Hands Photography
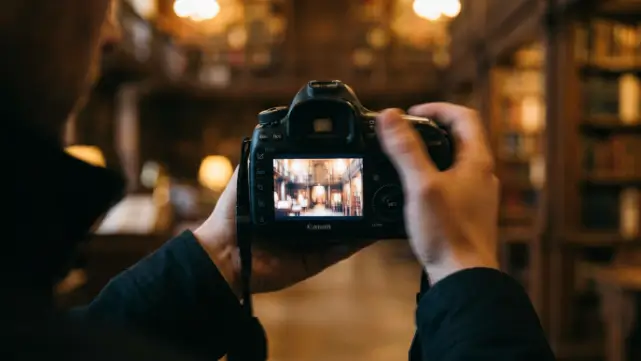
Before fixing the problem, it’s important to understand what shaky hands photography actually means.
Shaky hands photography happens when the camera moves slightly while taking a picture. Even tiny movement can create blur, especially in low light or when using zoom lenses.
This blur is called:
- Camera shake
- Motion blur caused by hand movement
- Unsteady photography
The issue becomes more noticeable when:
- Using slower shutter speeds
- Shooting in low light
- Zooming in heavily
- Holding the camera improperly
Why Camera Shake Happens
Many factors contribute to shaky hands photography.
1. Natural Hand Tremors
Everyone’s hands move slightly. Some people experience stronger tremors due to:
- Stress
- Fatigue
- Cold weather
- Too much caffeine
- Medical conditions
Even healthy people experience small hand movements that cameras can detect.
2. Slow Shutter Speed
A slow shutter speed keeps the camera sensor exposed for a longer time. During that time, even tiny hand movement can blur the image.
For example:
- 1/500 second = easier to hold steady
- 1/20 second = much harder to keep stable
This is one of the biggest causes of shaky hands photography.
3. Heavy Camera Equipment
Large cameras and long lenses can become tiring to hold. As muscles fatigue, stability decreases.
Heavy equipment often causes:
- Arm strain
- Unsteady grip
- Faster shaking over time
4. Poor Camera Holding Technique
Many beginners hold cameras incorrectly without realizing it.
Common mistakes include:
- Holding the camera with one hand
- Locking elbows awkwardly
- Standing in unstable positions
Small posture adjustments can make a huge difference.
How to Fix Shaky Hands Photography
Now let’s explore the best solutions step by step.
Use Faster Shutter Speeds
One of the easiest ways to reduce blur is increasing shutter speed.
Recommended Minimum Shutter Speed
A common rule is:
Use a shutter speed equal to or faster than your lens focal length.
Examples:
- 50mm lens → at least 1/50 sec
- 200mm lens → at least 1/200 sec
Faster shutter speeds freeze motion better.
Best Settings for Handheld Photography
For sharper handheld photos, try:
- 1/125 sec for portraits
- 1/250 sec for moving subjects
- 1/500 sec for sports or action
These settings greatly reduce shaky hands photography issues.
Improve Your Camera Grip
Proper grip creates more stability.
Correct Camera Holding Technique
Use Both Hands
- One hand grips the camera body
- The other supports the lens underneath
Keep Elbows Close
Tuck elbows against your body for support.
Relax Your Grip
Holding too tightly can increase shaking.
Improve Your Body Position
Your stance affects stability more than most people realize.
Stable Standing Position
Try this:
- Stand with feet shoulder-width apart
- Keep one foot slightly forward
- Bend knees slightly
This creates balance and reduces movement.
Use Your Environment
You can stabilize yourself using:
- Walls
- Tables
- Trees
- Railings
Leaning against solid objects helps tremendously.
Use Image Stabilization
Modern cameras and lenses often include stabilization technology.
Types of Stabilization
Optical Image Stabilization (OIS)
Built into lenses.
In-Body Image Stabilization (IBIS)
Built into the camera body.
Both systems reduce blur caused by hand movement.
How Effective Is Stabilization?
Some systems allow photographers to shoot:
- 3 to 7 stops slower
- While still keeping images sharp
This is especially useful in low-light photography.
Use a Tripod
A tripod is one of the best tools for fixing shaky hands photography problems.
Benefits of Tripods
Tripods:
- Eliminate most camera shake
- Improve sharpness
- Allow slower shutter speeds
- Help with night photography
Best Situations for Tripod Use
Tripods work best for:
- Landscapes
- Long exposures
- Product photography
- Studio work
Use a Monopod
A monopod is lighter and faster than a tripod.
It helps:
- Reduce vertical movement
- Support heavy lenses
- Improve sports photography stability
Many wildlife and sports photographers prefer monopods.
Control Your Breathing
Breathing affects camera movement.
Professional Breathing Technique
Before taking a photo:
- Take a breath
- Exhale slowly
- Hold briefly
- Press the shutter gently
This minimizes movement.
Press the Shutter Gently
Many blurry photos happen because people jab the shutter button too hard.
Instead:
- Press slowly and smoothly
- Avoid sudden movement
Gentle pressure creates sharper images.
Use Burst Mode
Burst mode increases your chances of capturing a sharp image.
Why Burst Mode Helps
When taking multiple photos rapidly:
- Some frames may be sharper than others
- Hand movement varies slightly between shots
Professional photographers often use this trick.
Increase ISO When Necessary
Higher ISO allows faster shutter speeds.
Example
In low light:
- ISO 100 may require 1/20 sec
- ISO 1600 may allow 1/125 sec
The faster speed reduces shake blur.
Balance ISO Carefully
Too much ISO creates noise, so find a balance between:
- Brightness
- Sharpness
- Image quality
Modern cameras handle high ISO much better than older models.
Use Proper Lens Techniques
Long lenses magnify shake.
Telephoto Lens Tips
When using zoom lenses:
- Increase shutter speed
- Support the lens properly
- Use stabilization if available
The more zoom you use, the more noticeable hand movement becomes.
Strengthen Your Hands and Arms
Physical stability matters.
Helpful Exercises
Simple exercises improve control:
- Grip strength training
- Wrist exercises
- Light weightlifting
Stronger muscles help reduce camera shake during long sessions.
Reduce Caffeine Before Shooting
Too much caffeine may increase hand tremors in some people.
If you notice shakiness:
- Drink more water
- Reduce energy drinks
- Avoid excess coffee before important shoots
Small lifestyle changes can improve stability.
Use Lightweight Equipment
Heavy cameras become difficult to hold steadily over time.
Consider:
- Smaller mirrorless cameras
- Lightweight lenses
- Comfortable straps
Modern lightweight gear can still produce professional results.
Best Camera Settings to Reduce Shake
Aperture Priority Mode
This mode allows:
- Automatic shutter adjustment
- Faster shooting
- Easier exposure control
Auto ISO
Auto ISO helps maintain safe shutter speeds automatically.
Many cameras allow you to:
- Set a minimum shutter speed
- Let ISO adjust when needed
This is excellent for shaky hands photography situations.
Common Photography Situations and Solutions
Low Light Photography
Low light is the biggest challenge.
Solutions:
- Raise ISO
- Use stabilization
- Use a tripod
- Open aperture wider
Sports Photography
Sports require fast shutter speeds.
Recommended:
- 1/500 sec or faster
- Burst mode
- Monopod support
Portrait Photography
Portraits need steady focus on the eyes.
Tips:
- Use stabilization
- Shoot multiple frames
- Keep posture stable
Smartphone Photography Tips
Phone cameras are also affected by shaky hands.
Improve Mobile Photo Stability
Use Both Hands
Avoid one-handed shooting.
Hold Phone Close
Holding closer to your body increases stability.
Use Night Mode Carefully
Night mode often requires extra steadiness.
Use Smartphone Tripods
Small mobile tripods are affordable and useful.
Editing Can Help Slightly
Some software reduces minor blur.
Popular Editing Tools
Programs like:
- Adobe Lightroom
- Photoshop
- AI sharpening tools
can improve slightly soft photos.
However:
- Severe blur cannot truly be fixed later
Sharp photos should start in-camera whenever possible.
Mistakes to Avoid
1. Shooting Too Fast
Rushing causes instability.
Take a moment to stabilize yourself before pressing the shutter.
2. Ignoring Shutter Speed
Many beginners focus only on brightness and forget motion blur.
Always monitor shutter speed carefully.
3. Holding Breath Too Long
Holding your breath excessively creates tension and shaking.
Use controlled breathing instead.
How Professionals Keep Photos Sharp
Professional photographers rely on consistency and technique.
They often:
- Use stabilization systems
- Practice proper posture
- Shoot multiple frames
- Understand lighting deeply
Experience helps them react quickly to unstable conditions.
Building Confidence as a Photographer
Many people become frustrated when their photos appear blurry. But shaky hands photography is extremely common—even among experienced photographers.
Improvement comes with:
- Practice
- Better habits
- Understanding camera settings
Every sharp image teaches valuable lessons.
The Psychology Behind Camera Shake
Stress and nervousness affect stability.
Photographers often shake more when:
- Shooting important events
- Working under pressure
- Photographing strangers
Relaxation and confidence improve stability naturally over time.
How Technology Is Improving Photography Stability
Modern camera technology continues to evolve rapidly.
New advancements include:
- AI stabilization
- Improved sensor technology
- Better low-light performance
- Advanced computational photography
Today’s cameras make it easier than ever to overcome shaky hands photography issues.
Final Thoughts
Learning how to fix shaky hands photography problems can completely transform your photography results. Sharp images are not only about owning expensive cameras—they come from understanding technique, stability, and smart camera settings.
Small changes make a huge difference:
- Faster shutter speeds
- Better posture
- Controlled breathing
- Stabilization tools
- Proper grip techniques
Photography is a skill built through patience and practice. Even professional photographers deal with shaky hands occasionally. The key is learning how to reduce movement and adapt to different shooting conditions.
With the methods in this guide, you can confidently capture clearer, sharper, and more professional-looking photos in almost any situation.
 Rizwan Aslam
 Hamza
Hamza